If you work with BIM models in Revit or IFC format but spend your days producing 2D documentation — floor plans, sections, elevations, door schedules — you’ve probably wished for a tool that bridges the gap between complex 3D BIM data and clean, production-ready DWG drawings. Enter the DraftSight BIM Module, now available in DraftSight Premium.
This isn’t a replacement for your BIM authoring tool. Think of it as a powerful 2D documentation engine purpose-built to consume BIM data and output professional 2D deliverables — faster, with less friction, and with full data integrity.
Here’s a first walkthrough of how it works.
What You Need to Get Started
- DraftSight Premium — the BIM module is included in this tier.
- A BIM model file — Revit (.RVT) files from 2011–2025, or IFC files (IFC2x3, IFC4, IFC4x1, IFC4x2).
- That’s it. No plugins, no additional licenses.
Step 1: Import Your BIM Model
Launch DraftSight Premium and go to Insert > BIM > Import BIM File (or type BIMIMPORT on the command line).
- Select your .RVT or .IFC file.
- DraftSight reads the file preserving geometry, dimensions, materials, and object properties.
- The model appears in your DWG as 2D representations of BIM elements — walls, doors, windows, slabs, columns, etc. — not a heavy 3D mesh.
Pro tip: If you’re importing a large model, the process is surprisingly nimble. The BIM Navigator Palette (more on that below) helps you stay organised even with complex multi-storey structures.
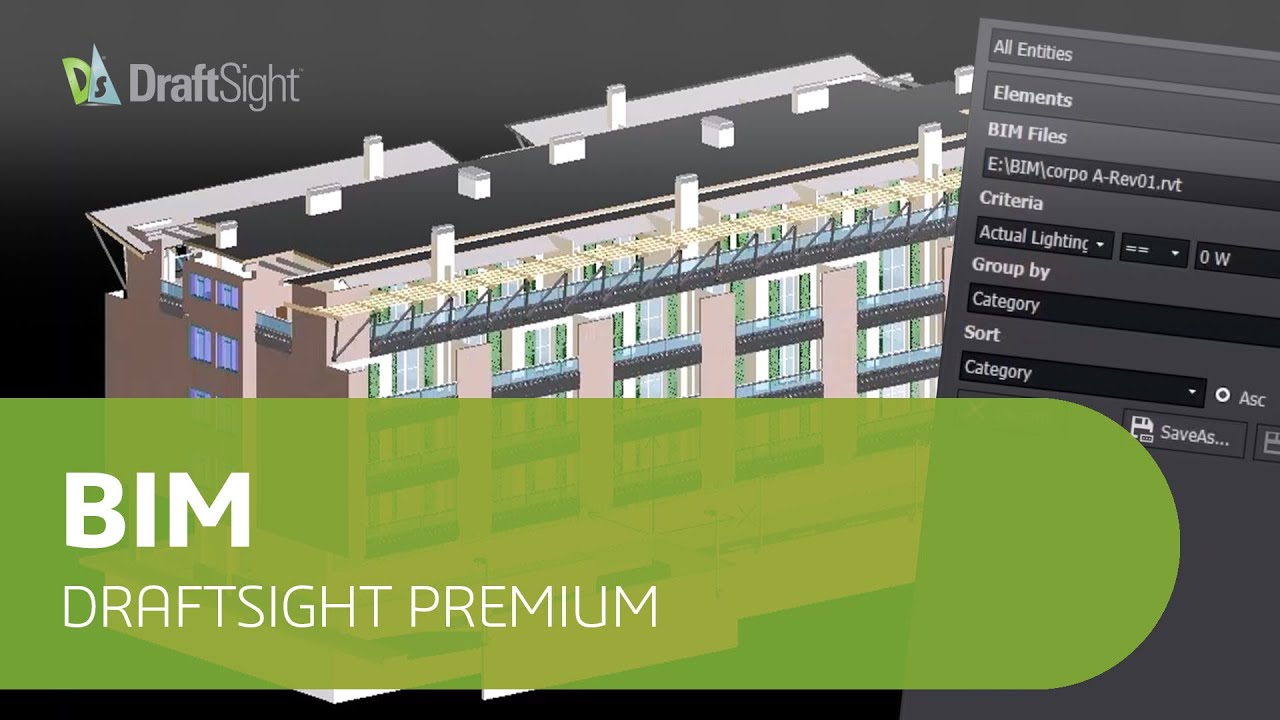
Step 2: Navigate with the BIM Navigator Palette
Once your model is imported, open the BIM Navigator Palette (View > Palettes > BIM Navigator). This is your command centre.
![]() The palette lets you:
The palette lets you:
- Filter by category — show only walls, only doors, only slabs, etc.
- Filter by level/storey — isolate a single floor of a multi-storey building.
- Toggle visibility of specific object types so you can focus on what matters for the current view.
- Inspect properties of any BIM object — click it and see its native BIM attributes (material, fire rating, width, height, manufacturer data, etc.).
This filtering is what makes the module powerful: you’re not just tracing over a raster image. Every element retains its BIM intelligence.
Step 3: Generate 2D Views (Floor Plans, Sections, Elevations)
With the model imported and filtered, you can now produce drawings:
- Floor plans: Filter by level in the BIM Navigator, and your plan view is ready. Add dimensions, annotations, hatching — all with standard DraftSight 2D tools.
- Sections & Elevations: Use the
BIMSECTIONcommand to cut a section through the model. DraftSight generates the 2D representation automatically from the 3D BIM data.
The beauty? These 2D views are dynamically linked to the source BIM model. If the architect updates the Revit model, re-import it and your views update — no need to redraw manually.
Step 4: Annotate with Smart Labels
DraftSight’s BIM module supports custom label blocks that pull attribute data directly from BIM objects. For example, you can create a door tag block that auto-fills:
- Door number
- Width × Height
- Material
- Fire rating
Place the label on a door in your floor plan, and it reads the attributes from that object’s BIM data — no manual typing, no mismatches. This is a huge time saver on projects with hundreds of doors.
Step 5: Extract Schedules (Door Schedules, Material Takeoffs, etc.)
This is where the BIM module really shines.
- Go to Insert > BIM > Schedule.
- Define a filter — e.g. “All Doors on Level 1”.
- Choose which attributes to include in the schedule (dimensions, material, count, etc.).
- DraftSight generates a formatted table in your DWG with live data.
You can also export schedules to CSV for use in spreadsheets or procurement documents. Use table breaks to split a long schedule across multiple sheets — perfect for large projects.
The Material Mapper tool lets you map materials from the BIM model to your own drafting standards, so material representations stay consistent.
Step 6: Organise with Sheet Sets
Once you have multiple views and schedules, use DraftSight’s Sheet Set Manager to organise everything. The BIM module handles sheet sets that can run to hundreds of sheets — each sheet linked to its view, keeping cross-references and page numbers consistent.
The “Split Drawing” feature lets you break a large floor plan into manageable tiles across multiple sheets, each with its own title block.
Step 7: Print to PDF
When your documentation is ready, batch-export your sheet set to PDF. All line weights, hatches, annotations, and title blocks render correctly — presentation-ready output with no post-processing.
Who Should Use This?
- Architects & Designers — Turn complex Revit models into clean floor plans and furniture layouts.
- Construction Managers — Generate accurate schedules and material takeoffs for estimation and procurement.
- MEP Engineers — Extract MEP-specific data from BIM models into coordinated 2D drawings.
- Facility Managers — Maintain up-to-date as-built documentation without Revit seats for everyone.
- BIM Managers — Offload 2D documentation work while keeping control of data accuracy and standards.
Final Thoughts: CAD + BIM, No Compromise
The DraftSight BIM Module is a smart addition to any AEC workflow. It doesn’t try to be another BIM authoring tool — it does what DraftSight does best, which is fast, precise 2D drafting — and supercharges it with real BIM data.
If your team lives in Revit but produces documentation in CAD, or if you receive IFC files from consultants and need to turn them into contract-ready drawings, this module could save you hours per project.
DraftSight Premium with the BIM module is available with a free 30-day trial. Have you tried it yet? Let us know how it fits into your workflow.